
 This blog post does contain Amazon Affiliate Links. I have and will only post products that I have used, tested, and love. Thank you for supporting my blog.
At the beginning of May, a friend called me up to ask about this new Instagram account I had created. “What do you plan to do with it?” was the main topic of the conversation. “To learn”, was the only thing I could really boil it down to. In my mind, the focus of the work and the blogs, and potentially a YouTube channel, is to help document my learning experience. The more he and I talked, the more excited for me he started to become. Throwing out what was meant to be a joke, I asked him if he needed anything built. You know, as demo work for the page.
To my surprise, he said, “as a matter of fact I do”. Turns out he wanted to surprise his new wife with a new coffee table made to fit their room and their style. How could I say no? But wait. I have never built a coffee table… how hard could it be?… turns out, its hard. But with my current motto “Do What You Can” in mind I told him that I would figure it out and get some drawings together.
That leads us to step two; I Have A Plan. Let me start by saying this. I love Sketchup. I have been using this program for years and it has provided countless drawings and hours of fun for me. I have a background in Autocad and Photoshop so when I stumbled across this FREE design program, I was fast to start learning all about it. That’s right it’s free. It has changed a bit from the first version I had back when it was a beta program that Google was trying to launch for small creators. It seems like all of the videos/blogs you see now have been touched by Sketchup and that is awesome to me. I cannot say this enough. Get Sketchup and play with it. You will love it.
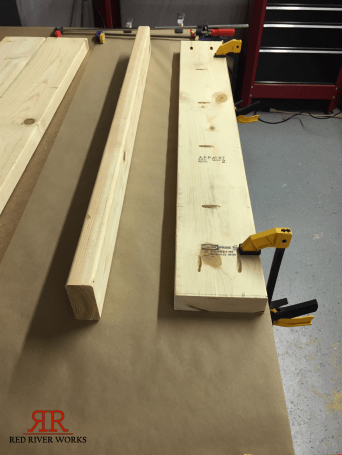
Step three; The Work Up. There is something special to me about hunting for lumber. Searching for that right board. I can still remember days where my dad and I would go to Home Depot, a project in mind, and select the wood that we would use. The internet is a great tool, all of the worlds knowledge at your fingertips if you know how to look. But what I couldn’t seem to find in my area is a really good source of high quality “furniture quality” lumber (still looking for that if anyone knows someone in the DFW area). Now as I am sure most of you are aware, the selection at somewhere like Home Depot is hit and miss. But with that being my best option at the moment I rolled up my sleeves and started eyeballing boards.
I found the straightest flattest boards that they had to offer. It took a while and a lot of digging. But once we had the materials in hand, Kellsie and I cringed at the cash register and headed home.
Side note: this is not a cheap hobby! But man when a piece comes together it is an extremely rewarding one. But more on that later.
Cutting time. I love my Ryobi Sliding Compound Mitre Saw. It is awesome and makes really quick work of getting the major cuts done for this table. For this project I used my Diablo 10” x 90 Teeth Ultimate Polished Finish saw blade, click here to grab it. This thing cuts super smooth and leaves the finished product feeling like glass. I wouldn’t recommend you use this blade for everyday cuts as it is not a cheap blade. But when you are working on a large item like furniture this blade will help keep some of the blowout down and prevent the need for some sanding later on. From my own mistakes in the past I can tell you that measuring 2 or 3 or 4 or… you get the point… times before you cut is vital. I like to lay out all of my cuts before hand (with the help of Sketchup).

Assembly. I think I might have gone a little overboard. I blame you Kreg! For the bottom shelf and table top I used my Kreg Pocket Hole Jig, click here to get the system, and Titebond Type 2 Wood Glue, my favorite wood glue (Click here), to secure each of the boards to each other. If you are like me and don’t have a planer/joiner yet in your woodworking shop, I recommend hitting any obviously rough spots between the boards with some sanding to help them meet up better when you are ready to screw/glue them together. Take it from me Titebond is some incredible stuff. Make sure you are 100% ready to join two pieces of wood before you put this stuff on something….
Again, this page is about learning. I want you to not make the same mistakes I did. If you are a master craftsman that has somehow found yourself here. Laugh at my mistakes. I am laughing at them too. You have to be able to laugh and then learn from the mistakes you make. If you are new to the trade like me. Learn. Listen to my words and know that there are other people out there in the same boat. WE will all make it through the learning curve. Leaning on others for support, information or advice is a must. Masters at this trade didn’t get there on their own. They had help and so do we. It is all over the place. Just be open to it.
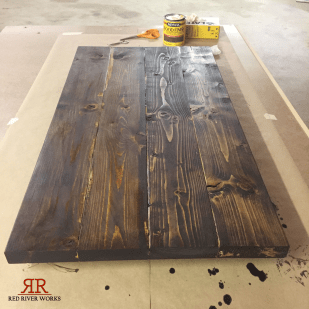
Finishing a project is a pain in the a@#. Thankfully I have the most amazing wife ever. @theturquiseteacher ← shameless plug for the love of my life. She is a huge help for me when it comes to picking colors and stains as well as one heck of a painter! If you are a hobbyist like I am, use this opportunity to get your friends or family involved. It is a good reason to spend time with the people in your life. Even if it is just to talk while they watch you stain. I love watching stain go on a project. It is a pivotal moment. You can finally see what all the hard work is going to look like at the end of the road. But to get there you have to sand. A lot. And then when you think you have sanded enough, sand some more. Getting a good finish on a project is about how much you are willing to dedicate to prep work. Sand until you think you have dust in places it will never come out of. It is worth every minute. But be sure to wear a mask and eye protection. I currently use a 3M Respirator (Click here). But I have heard great things about RZ Masks. If I am able to pick one of those up I will tell you what I think then.
For this table finish, we used Minwax Dark Walnut (Click here) and Minwax Fast Drying Polyurethane(Click here). Buy Minwax stuff. They make a quality lasting product that has been trusted for years. I love the colors that their stains produce and the application is easy and straightforward.
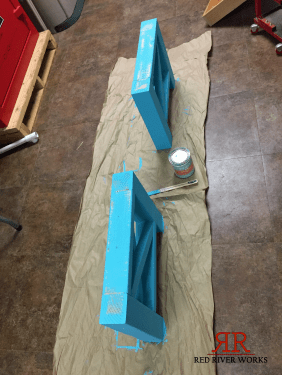
The paint for the legs is a chalk paint by Verathayne that I got from my local Lowes Home Improvement.
My final thoughts on the project went a little something like this.
-Oh man, this is not coming together at all they are going to hate it.
-I should just scrap the whole thing now and start over
-If they don’t see it they can’t hate it.
-Wait a minute. That actually looks pretty good.
-OK, they might actually like that. It looks awesome in the sun.
-Yea I am pretty pleased with that.
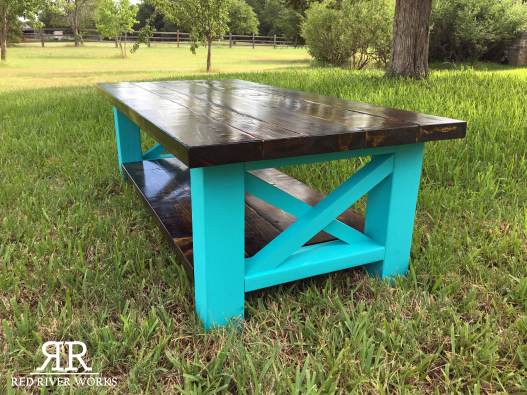
There was a lot going through my mind as I completed the final assembly. I was nervous as all get out. I wanted them to love it but was doubting everything I had done. Why did I get myself into this? Then I took it to them and guess what. They loved it. Their parents loved it. It matches their other furniture perfectly and they couldn’t be happier. Doubt and fear almost took me to the point of starting over. But I am glad I didn’t. The final product to me shows me that I still have so much to learn. But it also showed me that often we see things in our work that others don’t. What I see as a major issue to them was a character part that they loved.

In closing. It was a lot of fun to build this table. I have much to learn and can’t wait to get started on the next thing… just maybe not any large furniture just yet. Thanks for all of your time and I appreciate you reading what I have to say. I hope that I have helped you and that you will continue to keep an eye out for my next project.
-Blake
